Computer aided-design//
Designing a lamp in inskape
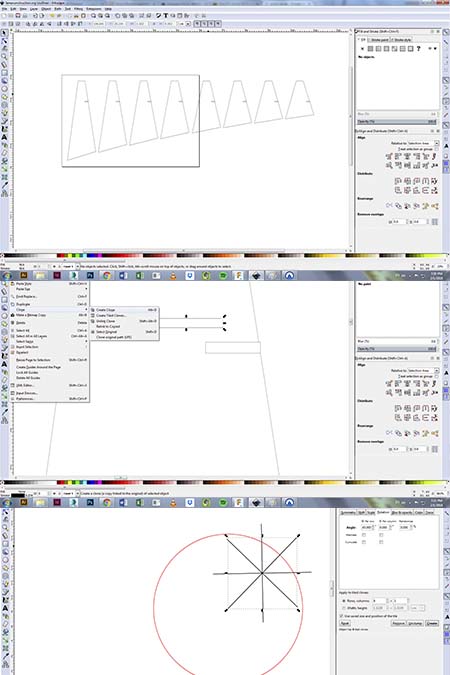
The first step was the design of a profile and a creation of a clone by using the clone command. After, seven more profiles were created by adjusting only the height by using the scale % command. With a similar way was created also the circular part after divided it into eight parts.
Modeling in fusion
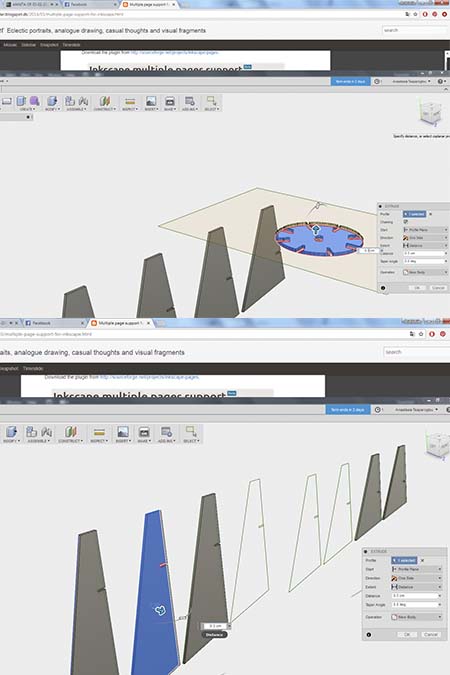
The svg file was imported into fusion 360 where the eight profiles were extruded (0.3 cm). The crircular holder of the lamp was extuded and rotated into the x axis. Some of the profiles were not recognized by fusion and they had to be sketched by new in fusion.
Assembling and rendering
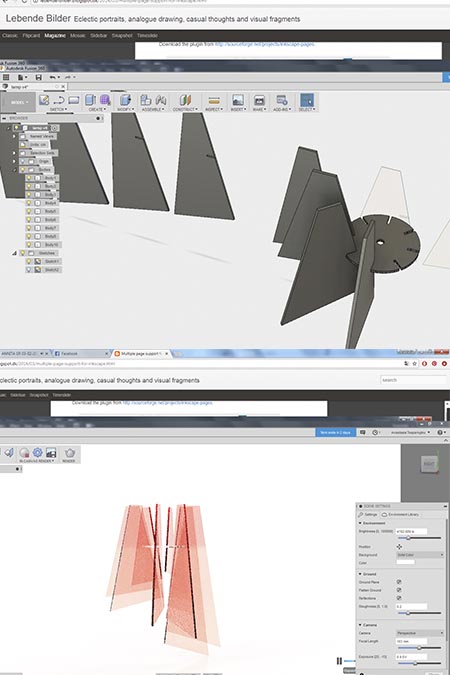
The different elements were rotated and placed into the right points of the circle. Into the materials/rendering panel were controlled the materials, the textures and the enviromental lighting. The final settings were material:transpapent red acrylic, enviroment:skylight light and perspective camera lens.
Final render and photoshop
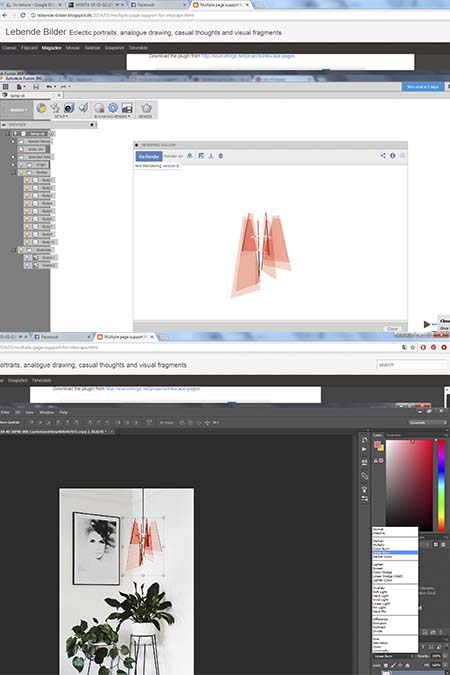
After rendering with a transparent background the jpg was imported into photoshop where a picture of a minimal room was used as an enviroment.The lamp was scaled, adjusted (the light/contrast settings) and placed on the background picture. Further filters were placed in order to achieve a realistic outcome.
Designing in illustrator
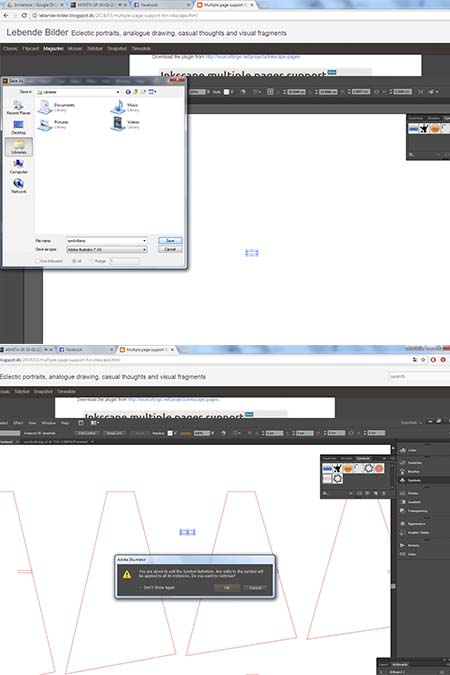
After years of using and loving illustrator, the same clone procedure was tested also here. The procedure is by creating a symbol and importing it directly to the file.The path is window -> Symbols ->Select all the components you wish to convert into a symbol -> then drag the graphic into the Symbols panel -> symbols option and name the new symbol they way you want -> place your symbols in your file.
Alternative design
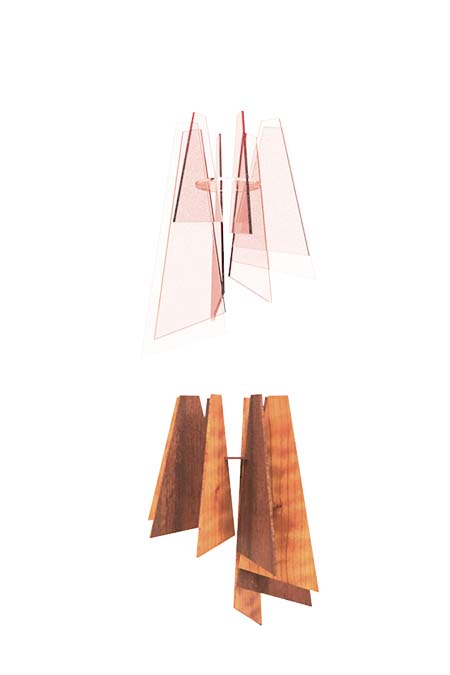
Apart from the pop and intense red acrylic material was used also wood as an alternative option. There was used two different kinds of wood, cherry and mable.Finally, it was rendered again and imported into a different enviroment
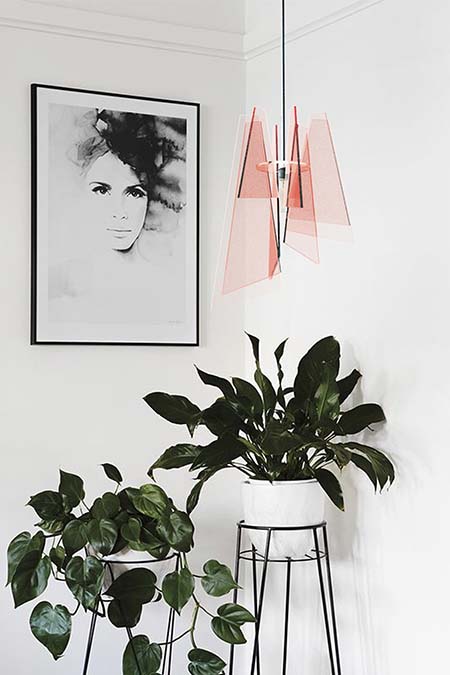
Acrylic lamp design
This pop style lamp consists of eight different profiles and a circular part which keeps the whole construction. The profiles are different in terms of height and they are placed into the right parts of the circle.Is a light construction which can be (dis)amounted multiply times.

Wooden lamp design
The concept of this design is to break the symmetry, by terms of dynamics and lighting. The way it is made promotes the DIY philosophy and the digital fabrication way!
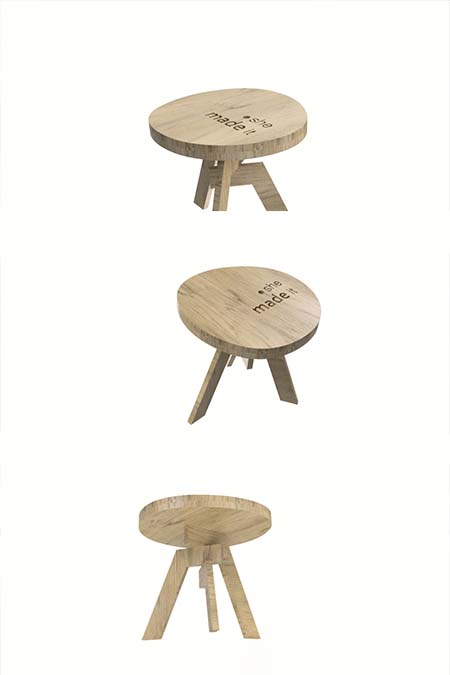
Easel table
Another project that i created in fusion is the easel table. My intention is to produce it in the cnc milling mashine in the following weeks.You can follow more here
HOW I CREATED A PRESS FIT LAMP IN FUSION//Step 1_Design the diferent profiles in a 2d software like illustrator or inskape and save the file as a svg. Step 2_ Open fusion 360, create a new file and go to insert -> insert svg. Step 3_ choose the right plane that you want to place the inserted file and them move the file in the position you want. Step 4_ Then follow create -> extrude -> type the value you wish. Step 5_ Extrude all the parts that you wish and then rotate all the parts you want to be rotated in order to be ready for assempling. Follow click the item -. right click and select move/copy -> make a copy -> ok.Step 6_ For rendering go to control panel -> render -> set up -> appearence. Here you can choose all the settings you wish to give to your file. Choose your materials, enviroment and lighting. Step 7_ Press the render button and wait for your render to be complete. You can choose the resolution, the view and the backgroung, white or transparent. Step 8_ Save your file as a png file.
HOW I CREATED A CLONE IN ILLUSTRATOR//Path_ window -> Symbols ->Select all the components you wish to convert into a symbol -> then drag the graphic into the Symbols panel -> symbols option and name the new symbol they way you want -> place your symbols in your file.
HOW I COMPRESSED AND RESIZED AN IMAGE WITH PHOTOSHOP//Step 1_ download the image and open it with photoshop.Press right click -> open with photoshop. Step 2_ toolbox -> image size. Step 3_ change the inches into percent and in width and height box type the percentage that you want your image to become smaller.Be sure that you press the little chane button betweent the width and height that keeps the analogy of the dimentions. Step 3_ Press ok.
HOW I COMPRESSED AND RESIZED AN IMAGE WITH GIMP//Gimp is an open source software that has exactly the same use as photoshop and with the same results as well. The workflow of compressing and resizing images in gimp is Step 1_ download the image and open it with gimp. Step 2_ toolbar->image -> scale image.Step 3_ change the inches into percent and in width and height box type the percentage that you want your image to become smaller.Be sure that you press the little chane button betweent the width and height that keeps the analogy of the dimentions.Step 4_ in gimp you can also set the resolution of your image and how much you would like to be. This is very useful especially if you are preparing your image for web purposes. Step 5_ quality and interpolation_ A very important part is how the pixels of your image will be resized. The best results coming from the Sinc and Lanczos resampling. Bicubic interpolation is the closest one to Lanczos resampling.Some gimp versions, like mine unfortunatelly do not provide the Lanczos interpolation, so the bicubic one is the best solution.
HOW I COMPRESSED AND RESIZED AN IMAGE ONLINE//Alot of platforms online can compress and resize an image automatically. I used the platform called toolur and i followed the specific workflow upload images -> set the image quality and compression type -> choose resize or compress image -> download image.
COMPARISON BETWEEN PHOTOSHOP, GIMP AND ONLINE RESIZING PLATFORMS//All tree of the above methods are pretty effective for resizing and compressing methods. By analyzing the final outcome i have to exclude the online one cause the final resolution(even if i controlled it)left some annoying pixel formations. Between gimp and photoshop i would probably choose gimp if my gimp version had the sinc and lanzcos choice but unfortunatelly i was not able to install it.
Conclusions//
The conclusion of this week is that learning is a continuous procedure and that the learning and combination of new softwares can give different results.
Links//
Download Inskape, Inskape tutorials, Download Fusion 360, Fusion tutorials,